|
|
| [Begin] [The Project] [Downloads] [Participate] [Simulator] [Sponsors] [Contact] [End] |
|
Everyone may contribute to the bluebox project by creating animations for the building. On this page you will find information how to do so. For questions and answers refer to the BlinkenArea forum. You can send your movie to bluebox (at) blinkenarea.org.
In generalAs file format for bluebox animations the bml-format is used. The Blinkenlights Markup Language was introduced by Project Blinkenlights and established as the standard for blinking applications. The resolution of the movie has to be 98 x 7 pixels and up to 128 greyscales can be used. Please consider, a 98 x 7 animation with 128 greyscales will not look the same on the building as on your computer. First, the aspect ration will differ, because the windows are not right above each other, there is some space between the levels. Hence the film will be stretched vertically. You should watch your movies with the Simulator to see, how it will really look like. Second, the greyscales of the halogen reflector lamps will differ due to production tolerances and the inertia of the lamps. Two close by greyscales may seem the same for the human eye when the lamps are next to each other. Therefor you should provide a good contrast in your animations. BlimpBlimp is written in Java, thus executable on all systems with recent Java runtime environment. At java.com the appropriate versions for Linux, MacOS X, Windows and Solaris can be downloaded. Mac OS(X)users can update their java via "software update" in the apple menu. Blimp may be used on your local computer as application [53 KB] as well as online or offline as a browser applet. While using a graphic user interface the jar file can be usually opened by double click. If not, you can start it by typing java -jar Blimp.jar into the command prompt. It will start automatically by opening the applet with a browser.
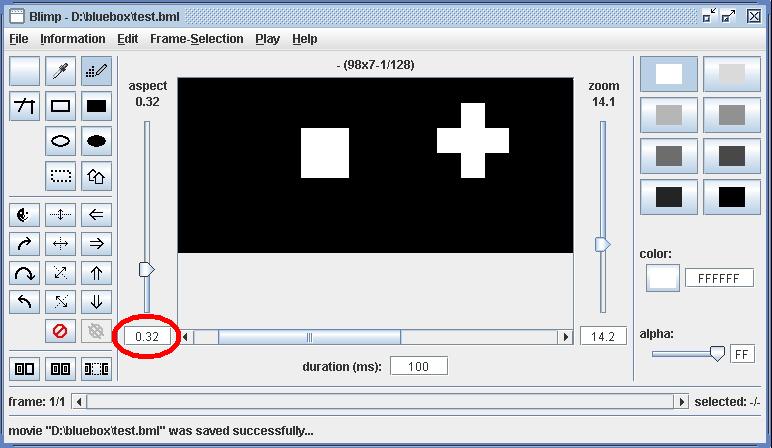
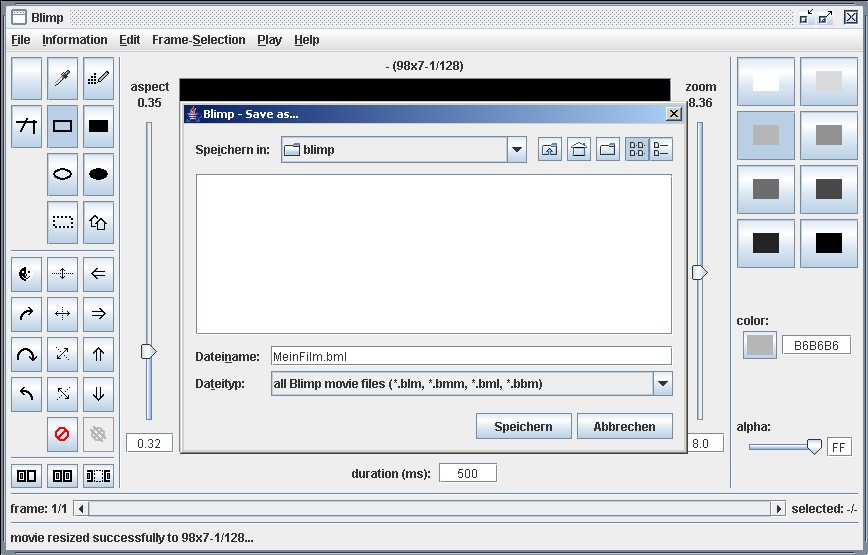
Blimp enables you to create or edit pictures and animations and to save them in the bml-format for bluebox. Blimp offers some simple draw functions and effects, furthermore it is possible to import images and sequences in common formats like png, jpg or gif. Hence it is possible to create a 98 x 7 movie with an animation program, which is usually not able to save the file as bml. The movie can be saved as a sequence of images and the imported to Blimp, which can save it as bml-file. To watch the movie in the correct ratio, the option "aspect" can be set. For bluebox it is 0,32 [width of window + frame / hight of floor = 0,90m / 2,84m ~ 0,32]. http://stefan.blinkenarea.org/Blimp/Scroller Perlscript
To use the script you will need Perl, i.e. ActivePerl (Perl distribution for AIX, HP-UX, Linux, Mac OS X, Solaris and Windows). Further you'll need a program,that can save images in the pgm-format (Portable Gray Map), i.e. The GIMP (free graphic application for Linux, BSD, Solaris, Mac OS X and Windows). When the image is available as pgm (raw) the script can be started by using the following syntax:perl scroller.pl <pgm-image> <width> <height> <bml-output> [<interval>] <pgm-image> = name of the source image in pgm-format (raw) <width> = width of the target movie (for bluebox 98) <height> = height of the target movie (for bluebox 7) <bml-output> = name of the target movie [<interval>] = duration of a frame in the target movie (in ms) Example: perl scroller.pl testpicture.pgm 98 7 testmovie.bml 120 http://stefan.blinkenarea.org/scroller.pl Convert movies into blm-format with MPlayerTo convert movies from i.e. avi into the bml-format, the MPlayer cen be used. Unfortunately this function is not activated by default. That means, if you use standard packages as provided by several Linux distributions resp. for Mac OS and Windows for download, it doesn't work. You have to download the sources and compile MPlayer yourself. This is not difficult for Linux, but we don't have experiences with Mac OS and Windows. If someone has MPlayer binaries with activated bml support, we would appreciate, if you send us an email to bluebox (at) blinkenarea.org . How to compile MPlayer with Linux:download sources If you would like to use the "Binary Codec Packages", you have to download them as well and extract to /usr/local/lib/codecs/ . extract sources tar -jxf MPlayer-x.xx.tar.bz2 change into directory cd MPlayer-x.xx configure with parameter --enable-bl to activate the bml support ./configure --enable-bl compile make install make install The video, you want to convert, should have a resolution which is a multiple of 98 x 7 , i.e. 196 x 14. You can also use other resolutions, but a 640 x 480 video converted into 98 x 7 , will not look satisfactory. You might choose an appropriate section in advance and cut it to get the right ratio. The video shouldn't be smaller than 196 x 14 , otherwise it is too small for the MPlayer. It is advisable to encode the video with a Jpeg-Codec first, because only in this format black will be truly converted into black in the .bml format. Other formats like mp4 or raw will save it as the first greyscale, a 1 instead of 0. Once you have a movie in a resolution of i.e. 196 x 14 pixels, it can be converted.mplayer vo bl:grayscale:file=test.bml zoom vf scale=196:14 test.avi
Create 3D-animations with Blender and convert with MPlayerEfelon has written a very good How-to, thanks for that!
|

![[bml made with Scroller Perlscript]](sim/movies/bluebox-01.gif)
![[A bml created with Digicam, VirtualDub, MPlayer and BlinkenTools]](sim/movies/julianes.augen.gif)